Kakori Village
As soon as you arrive, you will be greeted by the gate guards, who are incompetent as all hell and won't let you proceed.
 Crawli, the Head Ranger and Gym Leader arrives, and scolds them, and greets your crew. Melia will explain what's happening, and Crawli will be a gentleman and let us use an empty house next to his Gym. The crew head off without you as per usual, leaving you to explore the place.
 Anyway, Kakori Village is pretty huge. Here's a mud map I have drawn skilfully, and let's go through some of the stuff:
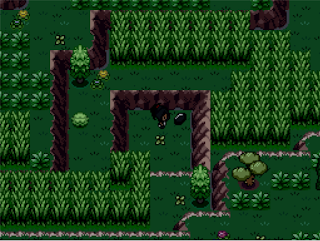
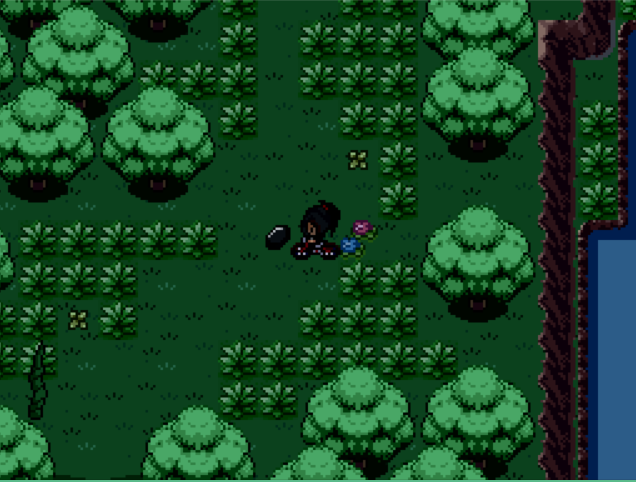
 There are random patches of grass here as well, which you can find some wild Pokemon
The house on the Top left of the Gym is the Help Centre. The quests are now getting longer and more difficult:


When you are finished exploring, go to the EH (Empty house) - where the crew are at. Take your place around the table next to Aelita and Braizen to start the converstaion. Melia will explain that the crew need to go to Valor Mountain. There will be an earthquake and stuff, and Crawli will explain that Valor Mountain is super emotional stuff.
 Before you can finish though, Rorrim B will storm into the house, and be disgusted that you are here in his "village", and storm out.
 After everyone else leaves, there will be a cute scene where Melia will confess that she's putting on a tough guy facade and stuff. She'll say she trusts you and leave.
 Once you are done, head upwards into Route 5 - Valor Path.
Route 5 - Valor Path
This path is filled with craters that you can't step in, as well as trainers and grass. Of course, witht he grass there are new wild Pokemon to catch:
 Head across the lake, and grab the items on the islands:


The house is here for the Tropius Help Centre Quest - I will cover it in that section. Head up the stairs towards Valor Mountain. You'll be greeted bu Zetta, who is already talking to the crew. He'll challenge you to a battle:

After the battle, Zetta will state how much he hates you (sore loser). He'll then give you a gift from Uncle Zetta, where Geara will activate the pillars, triggering an earthquake and causing a large magma pool that will block your path. Melia (despite having the HM Fly but is selfish and won't share) will recognise that she can't go in alone. Aelita will say that you will need Magma Drift to cross this, but unfortunately you don't have enough Gym badges for this. Apparently Adam and Saki are too strong to face (good joke), and so Melia will tell you to head back to Kakori Village, and challenge Crawli. Valerie will propose that we get out of here since the area is unstable:
 As per usual, they'll leave you here as they all head back off for the village together. Who needs friends? Head back to the village.
Kakori Village
As soon as you arrive, you will be greeted by the gate guards, who are incompetent as all hell and won't let you proceed.


- Available Pokemon
- Grass: Nincada, Beedrill, Butterfree, Foongus, Venonat
- R1 - The Resident in this house will want to trade her Yanma for your Roselia. You can grab a Budew in Corta Forest, and Soothe Bell it to happiness to trade.
- R2 - Resident will say "Isn't it pretty" but not tell you what she's referring to. Useless.
- R3 - Grandma will talk about Hoopa or something, Pops will tell you history about Aevium region. Sort of Useless
- R4 - These guys literally don't talk to you....at first.
- R5 - Lady will scream at you for entering her house, and allude to you being Link. Useless
The house on the Top left of the Gym is the Help Centre. The quests are now getting longer and more difficult:
- Clear the Way
- Guy will request help to clear the vines blocking direct entrance to Kakori Village. Speak to him at the vines and he'll tell you to retrieve 7 Black Shards

- This quest is ass. The black shards are here:


- After you find them all, talk to the guy again, who will use the black shards to cut an opening into the vines.

- Reward: $1780
- Tropius
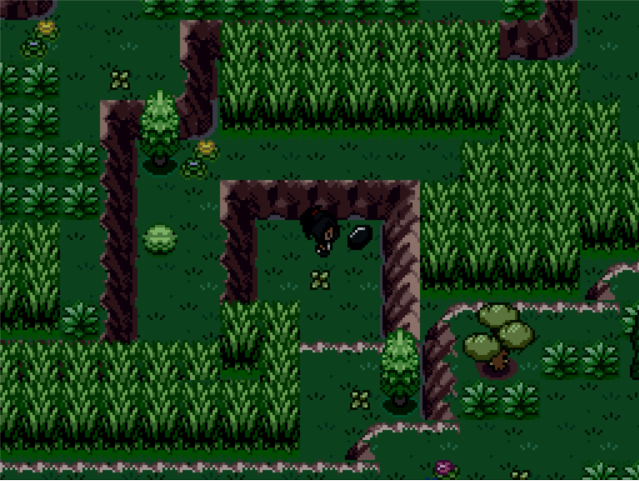
- A ranger is worried about the Tropius, who has been quite sad for the past few days. The Tropius will be at this forest clearing. As you interact with it, a Team Xen member will approach and try and steal more Tropius Eggs, causing the Tropius to get enraged and chase after her:

- You are instructed to chase after them, as Tropius is headed towards Route 5. Go into the house across the lake and she'll disappear down a ladder. As soon as you enter the next room, a caption will pop up, saying you are being watched....


- Check the planter next to the stairs to find her. She'll disappear down the next set of stairs and you'll have to find her again.

- Head down the stairs. She'll be in the second barrel from the top. She'll disappear down the stairs again and you'll have to find her.

- Head down the stairs. She'll be in the air conditioning vent on the far left bottom corner. She'll disappear again.

- Head down the stairs and you'll find she doesn't have anywhere else to hide., so she'll challenge you to a battle:
- Team Xen Starazia: Lv 51 Crobat, Lv 55 Beedrill, Lv 51 Bayleef
- After the battle, she'll try and call for Powerful Staraptor to back her up (Shofu reference?), but instead a bunch of Pidoves show up and attack her.

- She disappears, leaving behind a Tropius Egg. Which you cannot claim unless you have room in your party. Pick up the egg and head outside, where the Tropius and the Ranger will be waiting for you.

- Turns out the Tropius trusts you and wants you to keep the egg. Hell yeah!
- Reward: $1500, Rare Candy
- Building Bridges
- Guy wants to build a bridge to access a previously unexplored area in Terajuma Jungle. Speak to him at the Waterfall and he'll explain that the Timburr aren't cooperating because the lead Gurdurr isn't here.

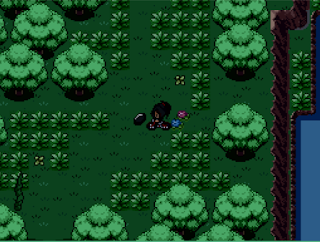
- The Gurdurr will be here in this Forest clearing, speak to it and it'll run off to the Rocky Terrain bit

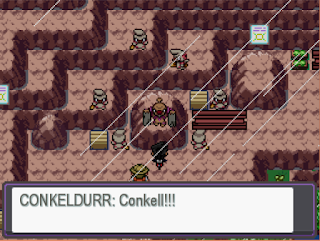
- Once you reach this area, speak to the man again and he'll try and coax the Gurdurr down, which won't work as "definitely not a Timburr" will urge the Gurdurr to rebel and will prompt the Gurdurr to evolve into Conkeldurr. You have to battle the Construction crew:

- Construction Crew Gurdurr: Lv 27 Timburr, Lv 38 Timburr, Lv 49 Timburr, Lv 60 Timburr, Lv 71 Timburr, Lv 82 Conkeldurr
- Once you defeat them, the Conkeldurr will come around, despite the coaxings of "Clearly Not a Timburr". The Character will appear to be Team Anti-Assist, who don't like it when you answer quests at the Help Centre. They will scurry off.

- Conkeldurr will come with the hiker and build the bridge, however the bridge will collapse due to a Sharpedo mauling it

- The hiker will try and get the Conkeldurr to build the bridge again, but tables turn and he is now working for the Conkeldurr. You'll still be able to cross though, since the wooden bridge remnants have turned into stone. wat.

- If you explore the new area that has been unlocked, you can grab a Leaf Stone, and eventually reach Moss Rock, which will allow you to evolve Eevee if you have one into Leafeon


- Reward: $2500, Sun Stone
- Find It
- A Lady lost her precious Roggenrola out in Terajuma Jungle and wants you to go find it. You can find the Roggenrola here. Speak to it, and it will join your party. Before you can do anything though, a grunt from Team Anti-Assist will show up. He'll tell you stop and scurry off again.

- Since the Roggenrola can't Surf, you'll need to take the long way around to get back to Kakori Village. On this exit, one of the grunts will be waiting to ambush you, and there will be more littered on the path back:

- Team Anti-Assist Sandra: Lv 46 Seadra
- Team Anti-Assist Andrew: Lv 48 Goomy, Lv 47 Goomy
- Team Anti-Assist Kevin: Lv 49 Relicanth
- Team Anti-Assist Birda: Lv 50 Exeggcute, Lv 49 Togepi, Lv 50 Togetic
- Team Anti-Assist Pech, Team Anti-Assist Lonk (doubles)
- Pech: Lv 55 Carbink
- Lonk: Lv 49 Gallade
- Make your way to the Pokemon Centre, where the trainer will thank you for rescuing the Roggenrola........Except he's not grateful, and has trapped you! The lad will turn into a grunt, and another will appear, and challenge you to a battle:

- Team Anti-Assist George, Team Anti-Assist Stephanie (Doubles);
- Lv 49 Lopunny, Lv 50 Ursaring, Lv 51 Camerupt, Lv 50 Vanillish
- After the battle, they'll curse you and disappear
- Reward: The advertised reward won't be available, but the attendant will give you 500$
- Battle me once more
- A girl would like to battle against someone once more to test her strength (It's the same girl from the Sheridan Village Help Centre I think). You can find her here in the middle of Kakori Village:

- Hardcore Trainer Adrian: Lv 52 Heliolisk, Lv 56 Jolteon, Lv 55 Drapion, Lv 53 Vivillon, Lv 55 hawlucha, Lv 57 Ninetales
- Reward: $4500, Max Repels, Reverse Candys, Super Potions,
- Chase Team AA: Once you complete all the Help Requests, the Attendant will be surprised, and try and give you a Magnemite, but not before team Anti-Assist comes and tries to ruin the day. They'll steal the Magnemite and crawl down the talking door. You should follow them down

- Enter the lab, and you'll see it's built kinda like a Team Xen one. Start by going right and to get the TM 57 Charge Beam

- Proceed left and take out that grunts (Eli and Sharon Clones) and pick up the Centre Keys
- Team Anti-assist Elik: Lv 46 Dunsparce, Lv 47 Seismitoad
- Team Anti-Assist Shardon (LOL): Lv 44 Solrock, Lv 45 Lunatone

- Proceed up the stairs in the centre. In this room, there will be 4 grunts who didn't think you would follow them. They will challenge you to a battle:

- Team Anti Assist Marcin (double): Lv 51 Kecleon
- Team Anti Assist Aruo(Double): Lv 47 Rapidash
- When you try and approach the girl with the Pokemon, she'll say that they will retreat for now and disappear. Grab the Pokeball, which will happen to be a Magnemite (I'd use it)


Route 5 - Valor Path
This path is filled with craters that you can't step in, as well as trainers and grass. Of course, witht he grass there are new wild Pokemon to catch:
- Available Pokemon
- Grass: Slugma, Spinda, Bibarel, Machoke, Machop, Medicham, Noctowl
Here are the Trainer things as well:
- Pokemon Ranger Shantae: Lv 46 Altaria, Lv 46 Ludicolo
- Pokeon Ranger Aiden: Lv 46 Ambipom, Lv 46 Primeape
- Pokemon Ranger Ritana: Lv 48 Steelix
Pick up these items whilst you are at it:


Head upwards until you come to the River crossing section. The water will be rapid and you won't be able to Surf through it, but there are stones here that you can jump on to cross. There's a hilarious bit here between Eli and Sharon where Eli gets swept away by the current.


Head upwards until you come to the River crossing section. The water will be rapid and you won't be able to Surf through it, but there are stones here that you can jump on to cross. There's a hilarious bit here between Eli and Sharon where Eli gets swept away by the current.


The house is here for the Tropius Help Centre Quest - I will cover it in that section. Head up the stairs towards Valor Mountain. You'll be greeted bu Zetta, who is already talking to the crew. He'll challenge you to a battle:

- Xen Executive Zetta: Lv 48 Absol, Lv 38 Chesnaught (Shadow), Lv 50 Roserade, Lv 48 Weavile, Lv 49 Vileplume
After the battle, Zetta will state how much he hates you (sore loser). He'll then give you a gift from Uncle Zetta, where Geara will activate the pillars, triggering an earthquake and causing a large magma pool that will block your path.


Kakori Village
Once you reach the gym, you'll notice the crew standing outside, talking to a woman. Talk to the woman yourself, and she'll inform you that Crawli isn't here, and no one knows where he is, except for Rorrim B, who is hanging out on route 3 (Surprise! Rorrim B is Crawli's Father).
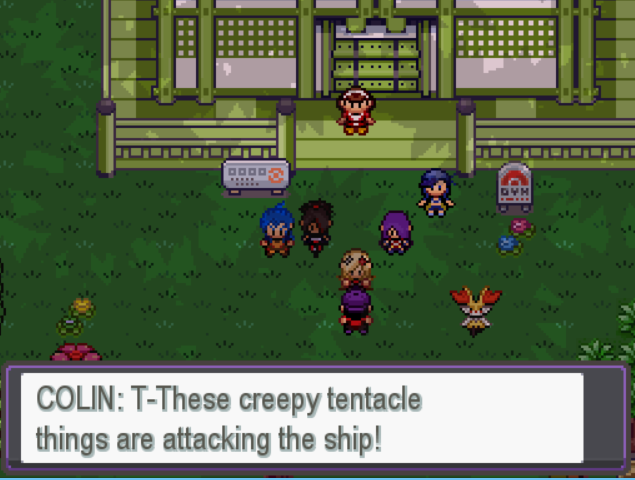
 As you are deciding with the crew where to look for Rorrim B, Colin (one of the kids you rescued) will run in with a puff, telling you that the Ship is being attacked by Dexoys (Xen Deoxys Clones).
 Valerie will scurry off to save everyone on the ship. Melia will be nice and ask if you are ready to go here and now, or if you wanted to stay back and do stuff first. If you choose to go with the crew, you'll be transported there immediately, otherwise you'll have to trek your way back.
Shoreline
As soon as you arrive, a Dexoy will notice you and engage you in a battle.


Shoreline
As soon as you arrive, a Dexoy will notice you and engage you in a battle.

- DNA Clone Dexoy: Lv 55 Deoxys (Flash Cannon, Psychic, Thunderbolt)
- Strategy: Paralyse with Sturdy user, and then smash away with strong attacks since they have poor defense. Heal at the hut when you need to.
After the battle, the Dexoy will disappear and you'll notice the beach is littered with them. If you take them all out, Valeria will give you TM 19 Rain Dance later, which is handy so I suggest you do so. You can also grab this Ability Capsule which I missed earlier:

Anyway, defeat all the ones on the beach and the two guarding the entrance to the boat and enter. The ship is pretty much deserted (except for Dibby and the Chefs). If you head upstairs you'll see Adam taking on one and Braixen taking on another on the rooftop. Head to the left and onto the deck, where you'll find Melia is contending with two Dexoy. She'll ask you to battle the one on her right:

After the battle, all of the Dexoy will disappear, and the general consensus will be that we need to move quickly. Everyone will teleport away. Speak to Valerie, and she'll give you the TM as promised:

Go talk to Augusts, who is in the cabin. He'll take you back to Gearen City:
